
Photoshop is a necessity here. I believe that all versions can basically do what we're talking about, including (I presume) Photoshop Elements.
bigtimeattic_color_files.zip
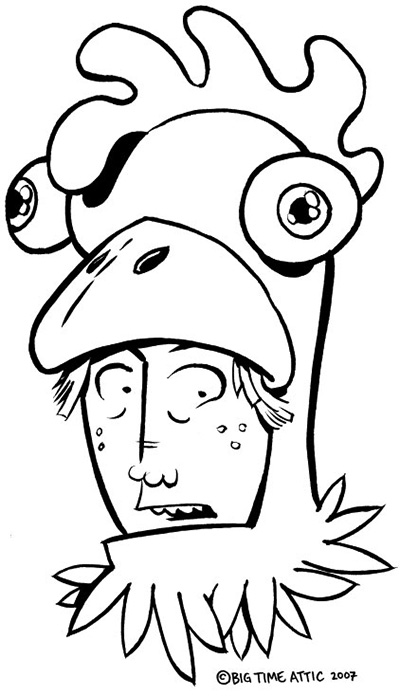
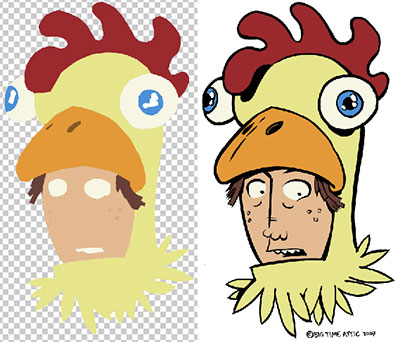
Start by downloading our image and unzipping it (double-click). You should have a file called "face_600.psd" (the file you'll be working on) and a file called "face_600_sample.psd" (our final colored version for comparison).
The file called "face_600.psd" is a bitmap file. That means it's just black and white, with no colors or grays.
We want to change it to a color image. Start by going to Image>Mode>Grayscale. Then go back to Image>Mode>RGB to make it a color file. The picture will look exactly the same, but the file will suddenly be about ten times as big.
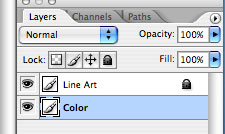
The simplest thing to do here is divide the picture up into two layers: the line art layer and the color layer. Double-click the background layer and rename it "Line Art". Set the mode to Multiply (i.e. anything white in this layer is transparent). Doing this will also unlock the layer.
Create a new layer and call it "Color". Move it below the line art layer. Its mode should be Normal. All the work you're going to be doing from now on is in this layer. Lock the "Line Art" layer for now so you don't accidentally edit it.
We now need to select the areas that will be colored in. To do this, we'll use the polygonal lasso tool. Click and hold down on the lasso tool to bring up the menu with the polygonal lasso in it. Make sure that it's set to Feather 0 pixels and that the Anti-alias checkbox is unchecked.
Now click inside the black line all the way around the head. When you are done, select the Paint Bucket tool (set Tolerance to zero and uncheck Anti-alias) and choose a color in the Color Picker (the two squares in the Toolbar). Click inside the "dancing ants" to fill the area.
Now select the hair. Since we've selected the outside of the hair already, you don't have to be careful on that part. Select far to the outside of it. Now fill the hair with a different color. The fill will stop at the end of the previous color.

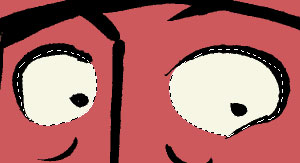
Now select the eyes. You'll have to finesse the open areas of the eyes because there are no lines to stay within. Fill with another color.
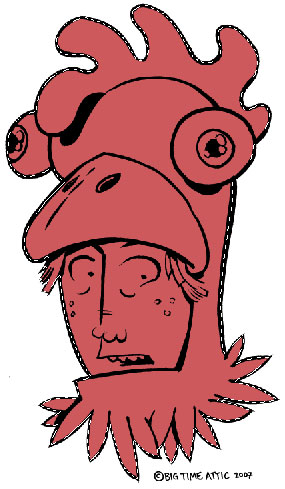
Finish selecting the rest of the shapes in the head and giving them different colors.
If you want to change the color of an area that you've already colored, just pick a new color and use the Paint Bucket and click on the area. It will automatically just change the color in that section. If you're getting a "halo" effect around your colors (you'll have to make the line art invisible to see it) you probably didn't turn off anti-aliasing on one or both of your tools. Tsk, tsk! You'll have to do that part again!
When you are finished coloring the image, you may want to put it online (the easiest form of publishing it). First, save the file as something descriptive, like "face_color_600.psd" so that you can go back and change things later if you want. Then, go to Layer>Flatten Image to merge the color and line art together. Now you want to make the art small enough to put on a website. Go to Image>Image Size... and a window will come up so that you can change the dimensions of your picture. To put things on our blog, we need to make images 405 pixels wide or smaller, so we usually set images to 405. The height will be automatically calculated. Hit OK.
Now, you want to save this picture, but you don't want to save over your layered version. Go to File>Save For Web... which will bring up a version of your picture. You can choose JPEG (for smoother lines and blended colors) or GIF (for flat colors and, in some cases, smaller file sizes). You can raise and lower quality on either to make your file size bigger or smaller. When you save, you should name it something slightly different so that you know that it's the web version, like "face_color_web.jpg"
One last thing! When you're closing the file, Photoshop will ask you if you want to save changes to "face_color_600.psd".
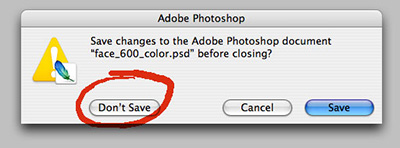
No, you do not. That will overwrite your layered file with the web file. You want to keep those separate.
Okay, those are the absolute basics. We'll be fleshing out individual sections of this tutorial as time goes by, so keep checking back. And hey, send us those colored images (405 pixels wide); we'd love to see them!
1 comment:
Zander, is that a chicken with you in its mouth? Fabulous.
I directed Faye to your info about the pen you use, and she is #201 to order it from the website!
Post a Comment