
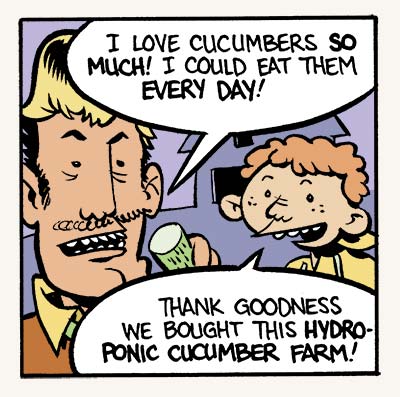
1. Figure out a few things before you draw: how big is the panel, how many word balloons will you need and where will they be placed? A thumbnail drawing is important here to work out your placement.
2. Rule your border with pencil. This panel is 3 in. x 3 in.
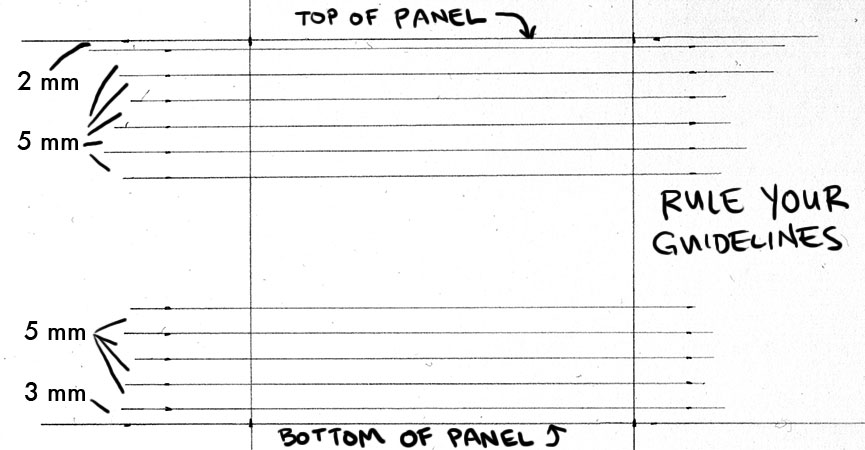
3. Rule your lettering guidelines. I don't use a professional guide, just a cheap plastic ruler. For whatever reason, I've found that I like having a 5 mm distance between lines. If your bubble is at the top of the panel, leave a 2 mm space from the top. If your bubble is on the bottom, leave a 3 mm space.
4. Figure out how your sentence will fit into the bubble before you draw anything. I like to scribble out a sample bubble on the script, making sure lines are the correct width. I try as much as possible not to break up words. If you have to break up a word, make the break at a logical point if you can (LOW-DOWN vs. LO-WDOWN), and try to break the word in between consonants (VER-NACULAR vs. VE-RNACULAR or VERNA-CULAR).
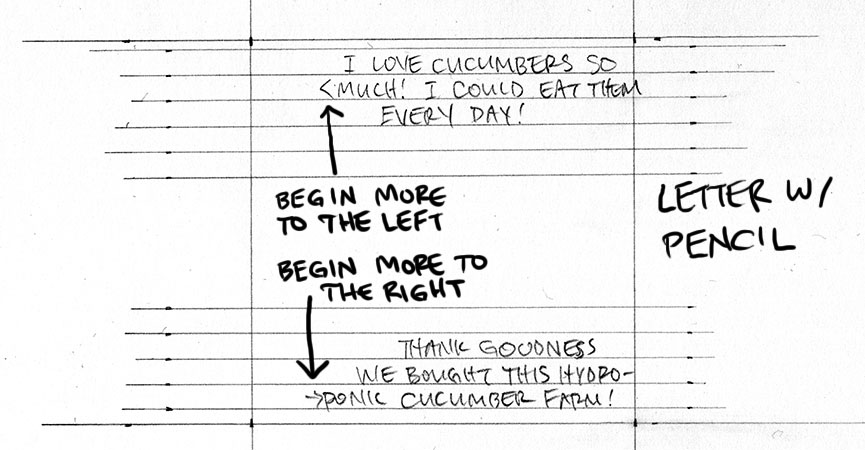
5. Pencil your letters. Keep a 1-2 mm space between the tops of your letters and the top line.
6. If you come to the end of the line, and you've either run out of space or have too much space, you can either erase and start over, or write a note to yourself at the beginning of the line (see below). I draw in arrows to tell me how to ink that particular line.
7. Ink your letters. For this exercise I'm using a Micron 05 for normal and Micron 08 for bold. I recommend keeping a piece of cardstock under your right hand during the whole lettering and inking process to prevent skin oils from getting on the page and to keep sweat from warping your paper. That tip is for right-handers only -- I don't know what you southpaws do.
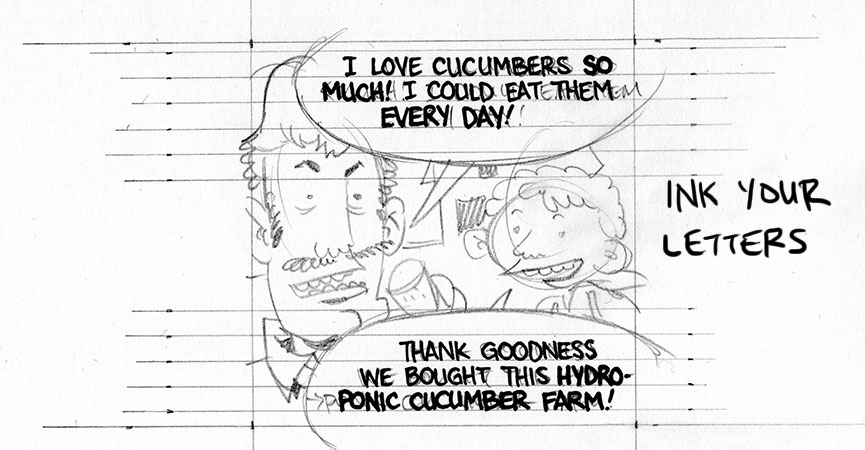
8. Pencil the rest of your drawing. Tightness is a personal preference, and will vary by project. If you're pencilling for yourself, and you're comfortable with your style, you can get away with loose pencils. If you're pencilling for someone else and you want them to ink it in a very specific way, then you need to put down very tight pencils.
9. Rule your borders. Here I used a Pigma Graphic 1 pen and a metal ruler with a raised edge. The raised edge will prevent the ink from bleeding underneath your ruler. If your ruler isn't raised, try taping something underneath, like cardboard or even coins.
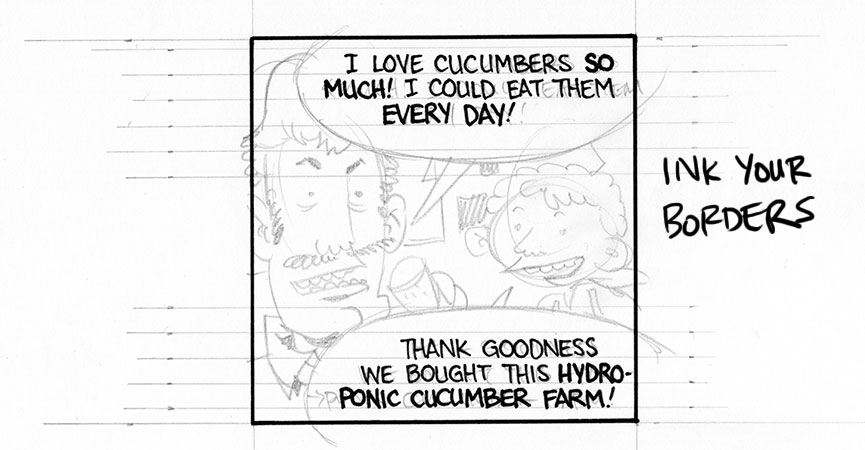
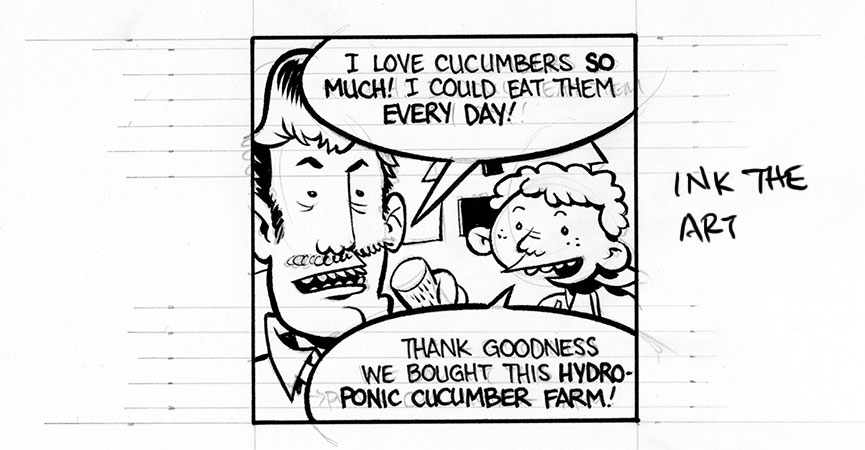
10. Ink the artwork. Here I used a Pentel Pocket brush pen.
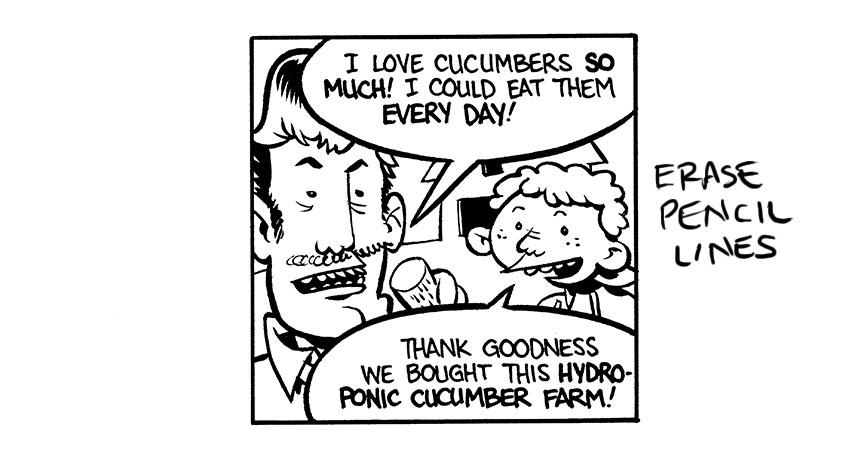
11. Erase the pencil lines. I recommend a kneaded eraser because you can make little sculptures with it. However, if you LOVE having millions of little crumbs everywhere, by all means use a regular eraser.
12. Scan and color. You're done.
5 comments:
I play a little game to see if I can tell who posted that day's cartooning lesson. I was sure that today was from Zander. I think that propinquity is at work here....
Breaking up a word at the end of a line has a few other tricks. For instance, VERNACULAR can be split up
VER-NACULAR (between consonants), VERNAC-ULAR (after a consonant), or VERNACU-LAR (after a long vowel).
Between root words (UNDER-WEAR), between double consonants (UN-DER), and after or before prefixes and suffixes (PRE-SCAN, COMFORT-ABLE) are always the best, but keep those other ones in mind. There's always a fitting-words-in crisis when you're lettering, don't you know.
I would also point out that you don't always pencil your lettering first (although I frequently do on a dialogue-heavy page). Sometimes you want to put in the characters and then work out how the dialogue fits around them. You should take care that these steps are part of the same step, so that you don't end up cramming in either the words or the pictures as an afterthought.
Kevin and I played a game called "Whose Mom Posted This Comment?" and both got it wrong. I figured the use of the word "propinquity", meaning the tendency when working or living with someone to pick up their traits, would point to Kevin's mom, who is a bit of a guru on Emotional Intelligence. Surprisingly, it was actually my mom, who is an artist that has a thesaurus.
Hey this is really neat stuff.
Thanks for the advice. I always thought the lettering came last :P
Post a Comment