Pages

Showing posts with label Game Informer. Show all posts

Tuesday, March 06, 2012

Game Infarcer: The Making of the Mortal Kombat Gag Cover!


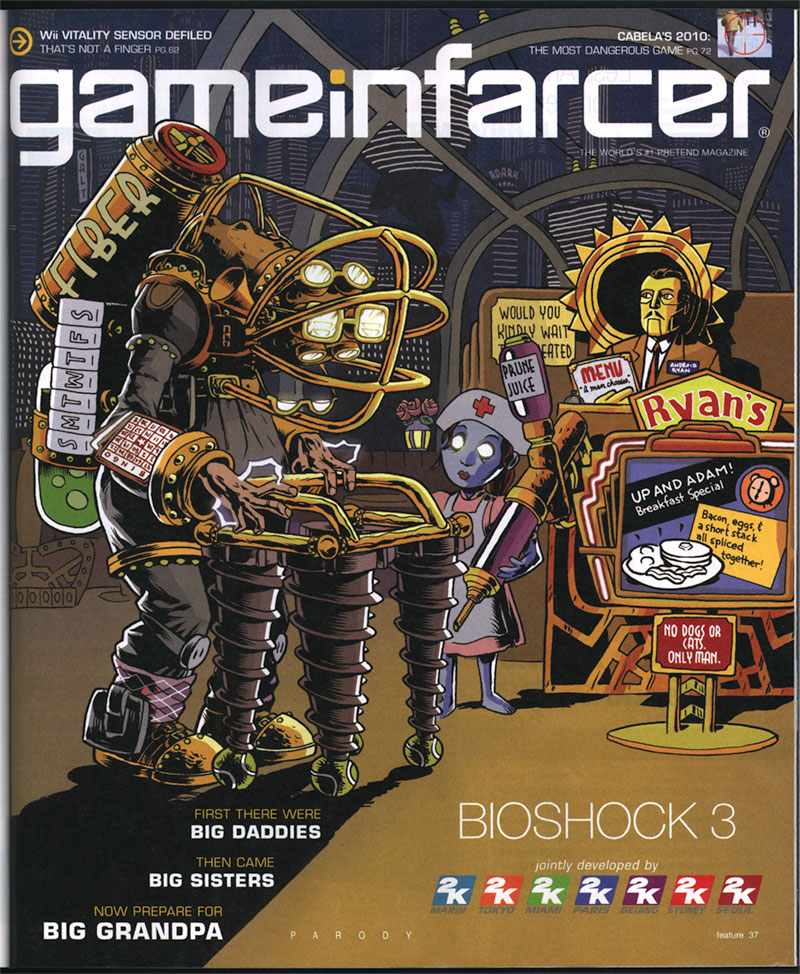
It's Game Infarcer time, everyone! I only tend to do a handful of actual illustration jobs each year (that is, single images that are colored by me), and I always look forward to Game Infarcer, Game Informer's snotty look at various games and game trends. I've provided the 'cover' (first page, that is) to this section for seven years now, and it's always great fun to call upon my funny-makin' skills as well as my coloring ones to crank this sucker out.

CONCEPT

As usual, the process starts with a meeting at Game Informer, and I knew I was in for a bit of trouble when Joe Juba said, "I didn't really think it was funny when they first told me, but now I do." Uh oh. Is this drawing going to need a paragraph next to it so anyone will know what they're talking about? But really, I thought, anyone can make a funny illustration when a rock-solid concept is laid in their lap; it's just going to take a little of that little thing I call "The Zander Cannon Magic". Okay, so. If you think that this sounds like foreshadowing for the part later in the story when I shoot the whole thing to hell, I say to you, "Shh, you're going to ruin it."

So I met with Joe Juba, Dan Ryckert, Tim Turi, Jeff Cork, and probably Ben Reeves. I don't know. Probably. Ben's always creeping around somewhere. They told me that the game we're riffing on is Mortal Kombat, then gave me a little back-story. The company that makes Mortal Kombat, NetherRealms, was purchased by Warner Brothers, and they've done some crossover things like Mortal Kombat Vs. The DC Universe, and now they've permanently added Freddy Krueger from Nightmare on Elm Street to the MK roster. So the gag is that Mortal Kombat isn't going to stop there; they're going to start grabbing characters from all of Warner Brothers' movies. They give me a list of notable movies in WB's film catalog, and we start brainstorming. The big idea they wanted in there was to make Tom Cruise's character from Risky Business be pulled across the floor by MK's Scorpion (the guy who says "Get over here!").

Now, whenever anyone says "Warner Bros", the only thing that anyone really knows that they made is Looney Tunes. I know, people might know that The Matrix or Harry Potter were Warner Bros movies, but it's like Disney-- you know the cartoon characters; everything else is a little fuzzy. And obviously as a cartoonist, Bugs Bunny, Elmer Fudd, Daffy Duck and the rest are very appealing things to draw, particularly the idea of them bloodying up -- or being bloodied up by -- Mortal Kombat characters. We even had a gag worked out where Bugs Bunny would be front and center, eating someone's arm like a carrot, and the drippy blood letters that usually say "Finish Him!" in MK would say "That's All, Folks".


Now the problem came when I wanted to flesh this gag out for the full illustration. If you have Bugs Bunny front and center, how do you put Tom Cruise's character in the background and have people realize what's happening? Bugs Bunny puts you in a certain frame of mind, and you're just not going to understand who some guy in his underwear is, and what he's doing there. So I started putting forth the idea that we could have the rest of the illustration populated by the rest of the WB cartoons; they make for great sight gags, their art style clashes appealingly with the "realistic" Mortal Kombat characters, and they're just plain old fun to draw. Wow, great! It's the old "Zander Cannon Magic" that everyone loves, coming through in the clutch!

Except... that's not what the gag is supposed to be. And that's not what they asked for. And with the setup of Freddy Krueger, it doesn't make a whole lot of sense. And finally, it turns out in the world of video games and the internet, the gag of 'cute characters killing or being killed' has been done once or twice or possibly ten million times.

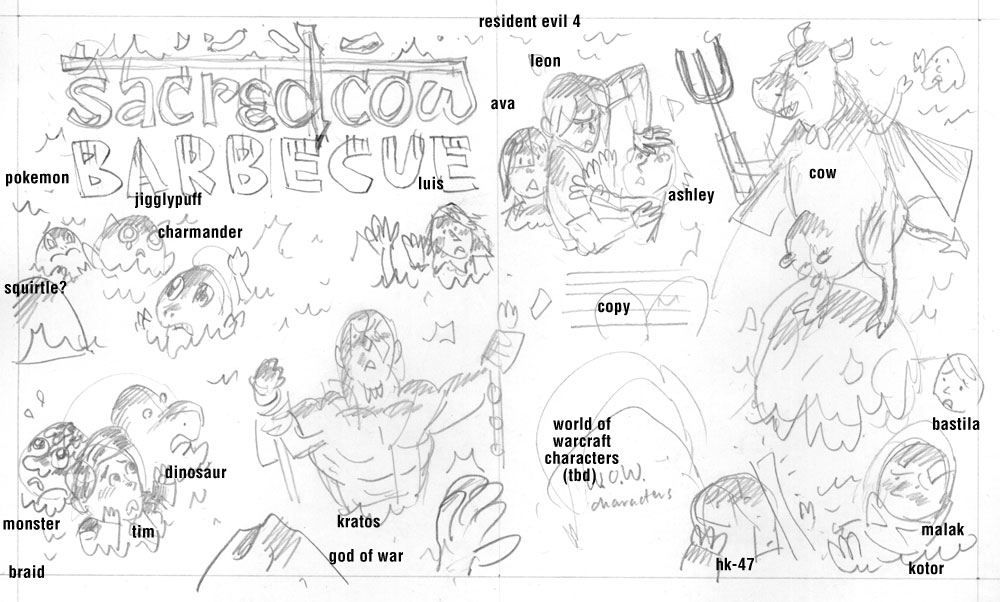
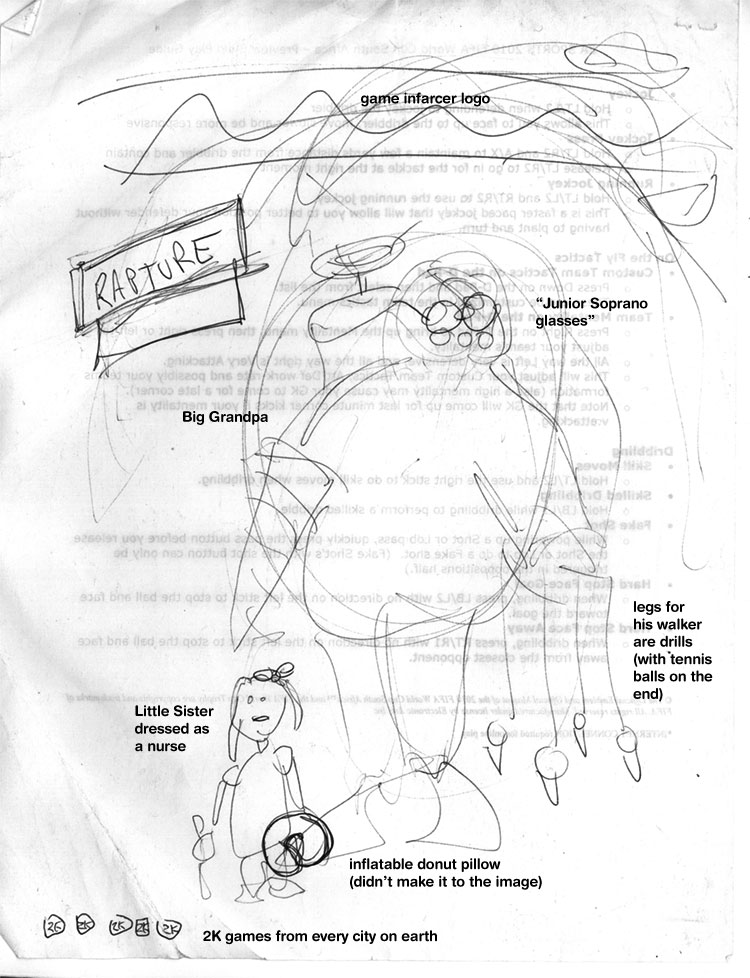
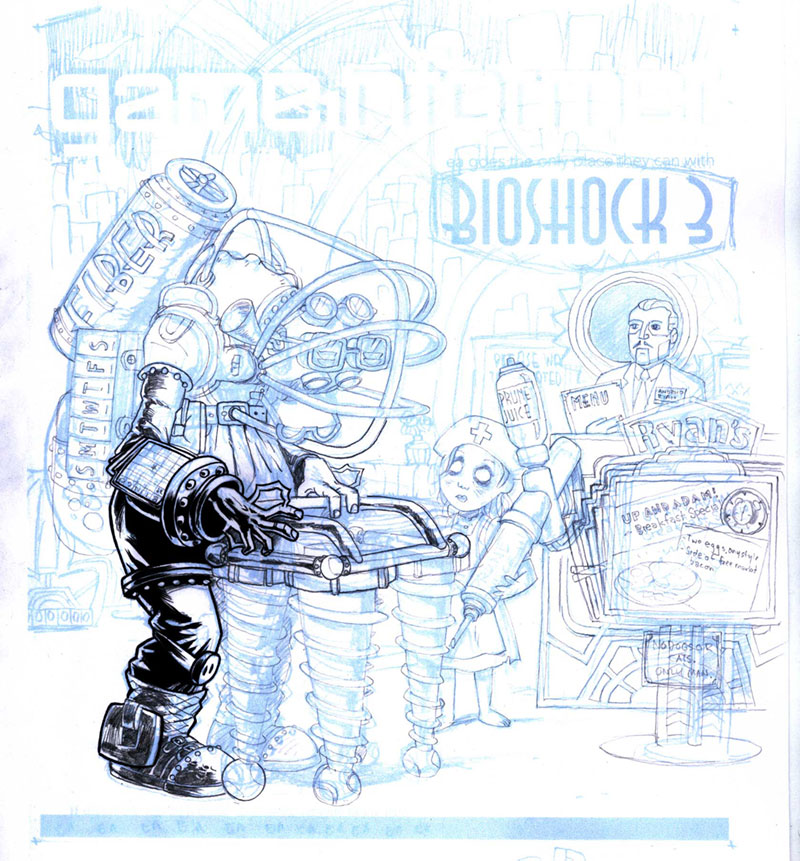
So I went back to the drawing board and really thought about what the GI folks were asking for. The Freddy Krueger setup is there to prepare us for the idea of NetherRealms going back into the film catalog and just looking for brand recognition at the expense of appropriateness. So I took another look at the big list of movies that Dan Ryckert gave me and went back to what we had discussed at the GI offices. So then I dropped in this sketch, assembling it from various mini-sketches into one document.


We've got Free Willy in the foreground, getting uppercut, Harry Potter getting struck by lightning, Tom Cruise about to be speared by Scorpion, and the part I was most happy with -- Bugs Bunny as the uppercut "Toasty!" guy. This illustration, and last year's illustration, are heavy with movie references, so I was really happy to put in a semi-obscure video game reference. In the earlier Mortal Kombat games (i.e. the ones I played), every time you uppercut someone, a little image of one of the programmers came out in a purple shirt and said "Toasty!". And so there was my excuse to put in Bugs Bunny.

LINE ART

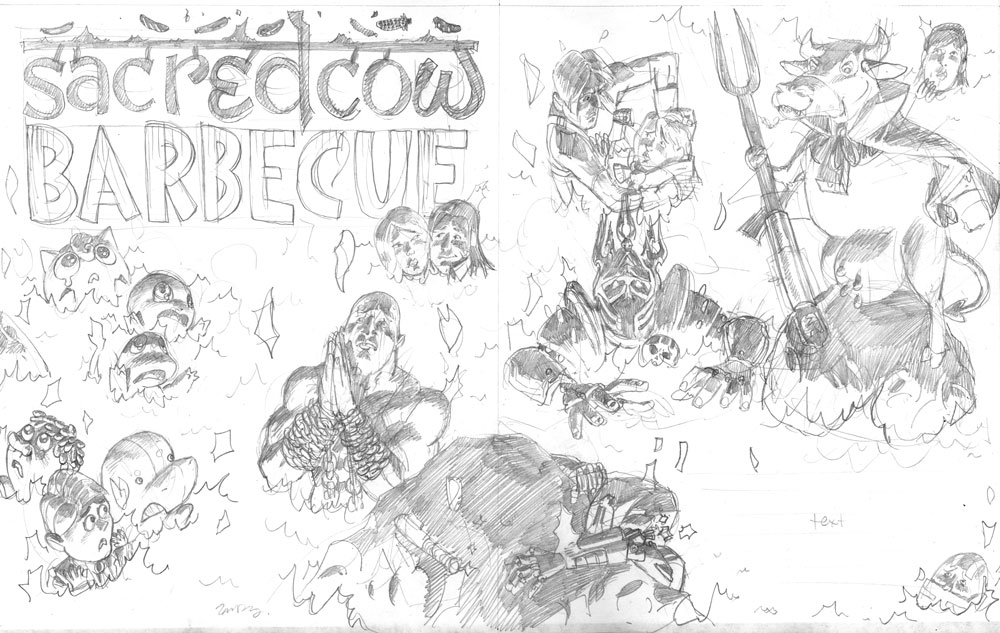
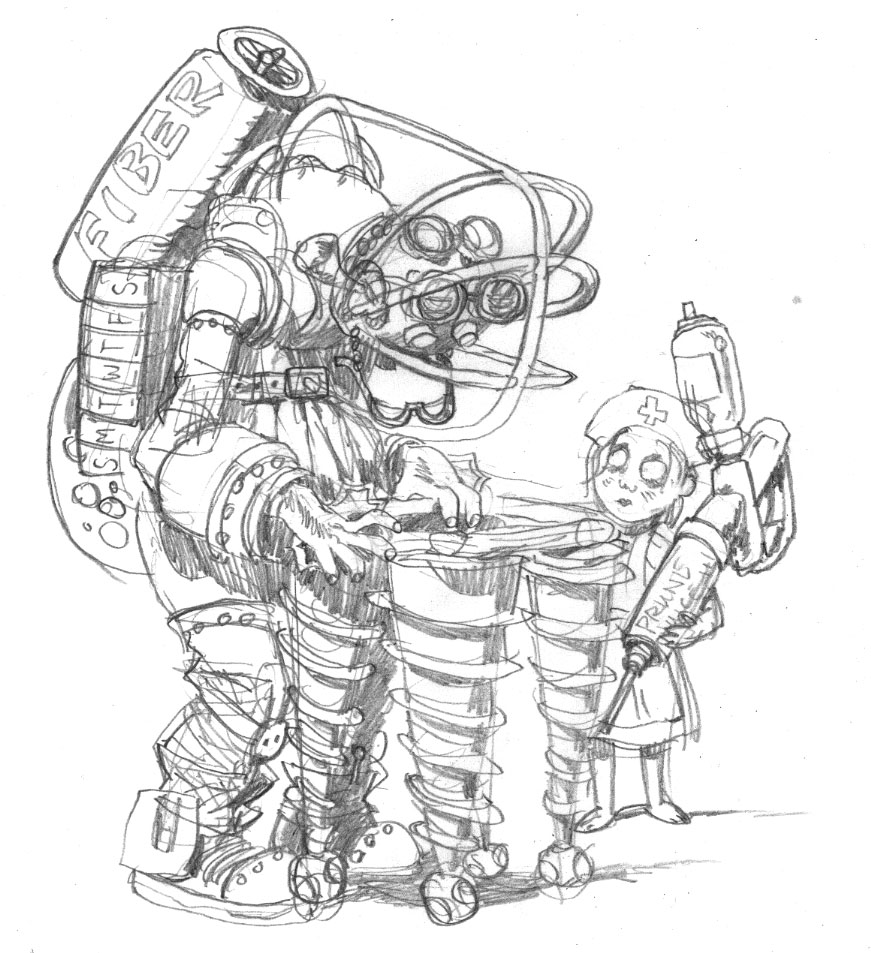
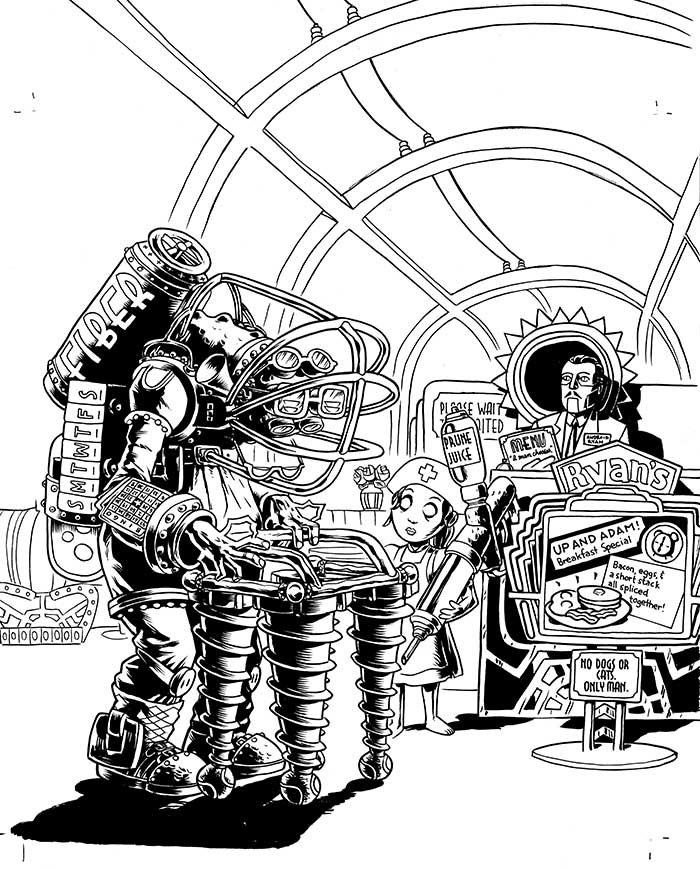
Since this drawing was much more about the various gags in it than a unified composition, I took a different approach to the line art. After getting approval for this sketch, I printed out several 10% cyan copies of this layout to use as guides for the final line art. What I ended up with was a pile of illustrations, all having very little to do with each other.


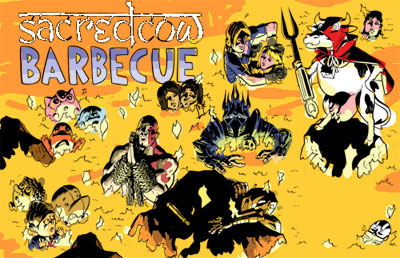
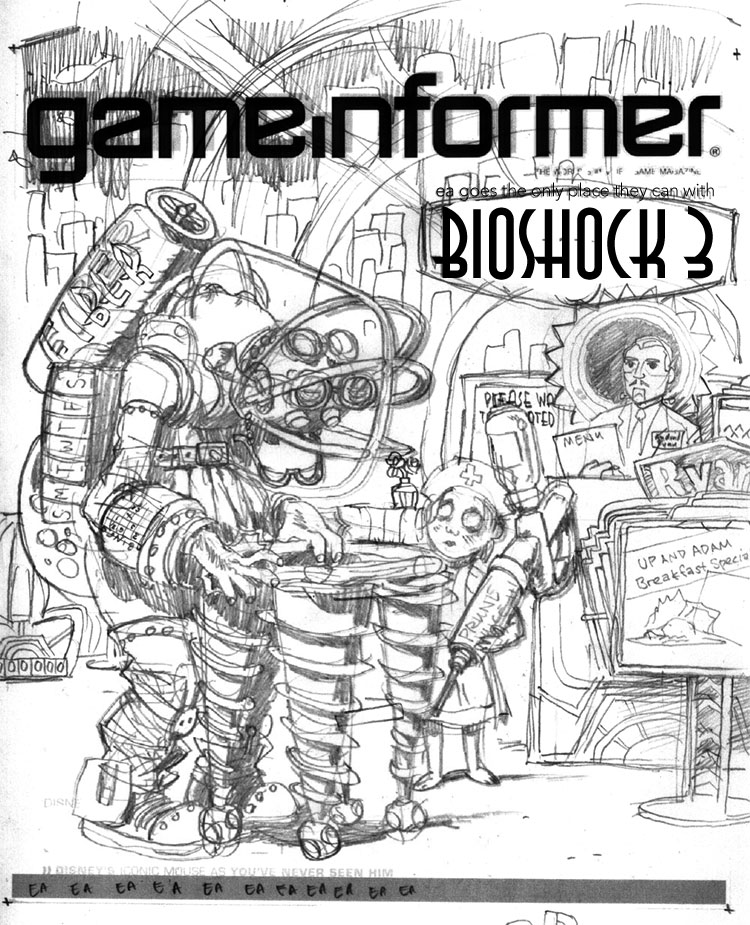
Then I scanned them and assembled them all into one document to figure out the final placement, as well as leaving room for the subhead text and logo.


The nice thing about creating final art elements separately like this is that you can work on the layout and get some solid feedback about how they look together, tweaking them at even a late stage. The tricky thing about it is that you end up with a lot of tangents that you have to futz with. Tangents in this case are places where a line in the foreground just barely touches a line in the background and makes it look like these two things, which are supposedly a large distance apart, are touching. Like this:


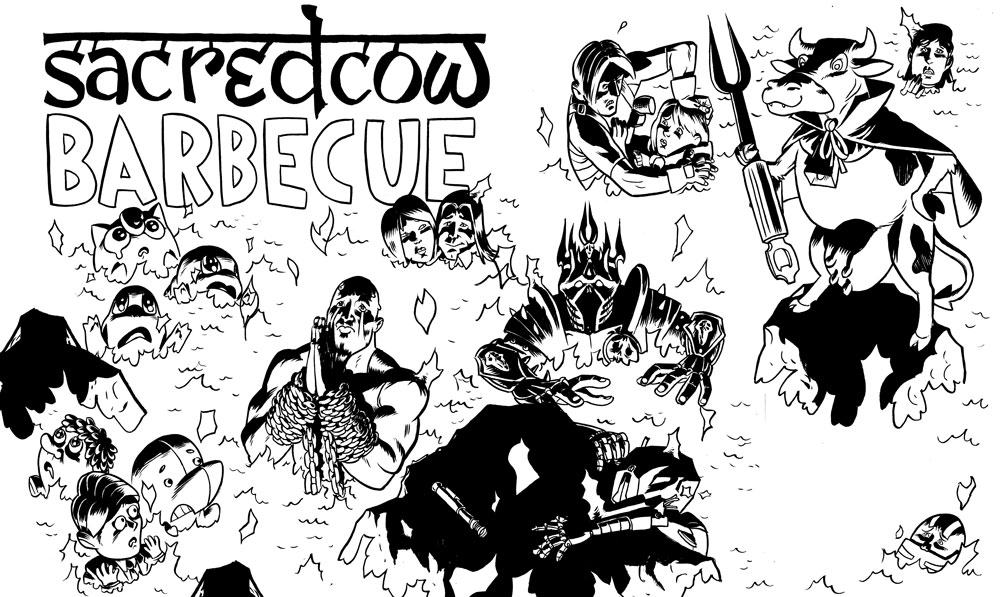
Once everything's in its place and I more or less have the kinks worked out, I go in and edit the lines so that things behind other things have their lines obscured, and the whole thing looks like a real drawing.

COLORING

I wanted to keep my ability to move the characters around as long as I could, so I decided to keep all the characters in their own layers as I colored. As you may know if you use Photoshop, having this many layers in a high-resolution file is extremely memory-intensive, and a slow computer like mine was at the time (that also limited the amount of RAM available to Photoshop) was not going to be able to handle it. So I saved the line art as a separate flat image and imported it into my new color file, making it a channel instead of a layer. This places it above all of the other layers, but saves on memory because Photoshop doesn't have to contend with all of the layer properties involved. A nice workaround for a situation where your memory is limited.


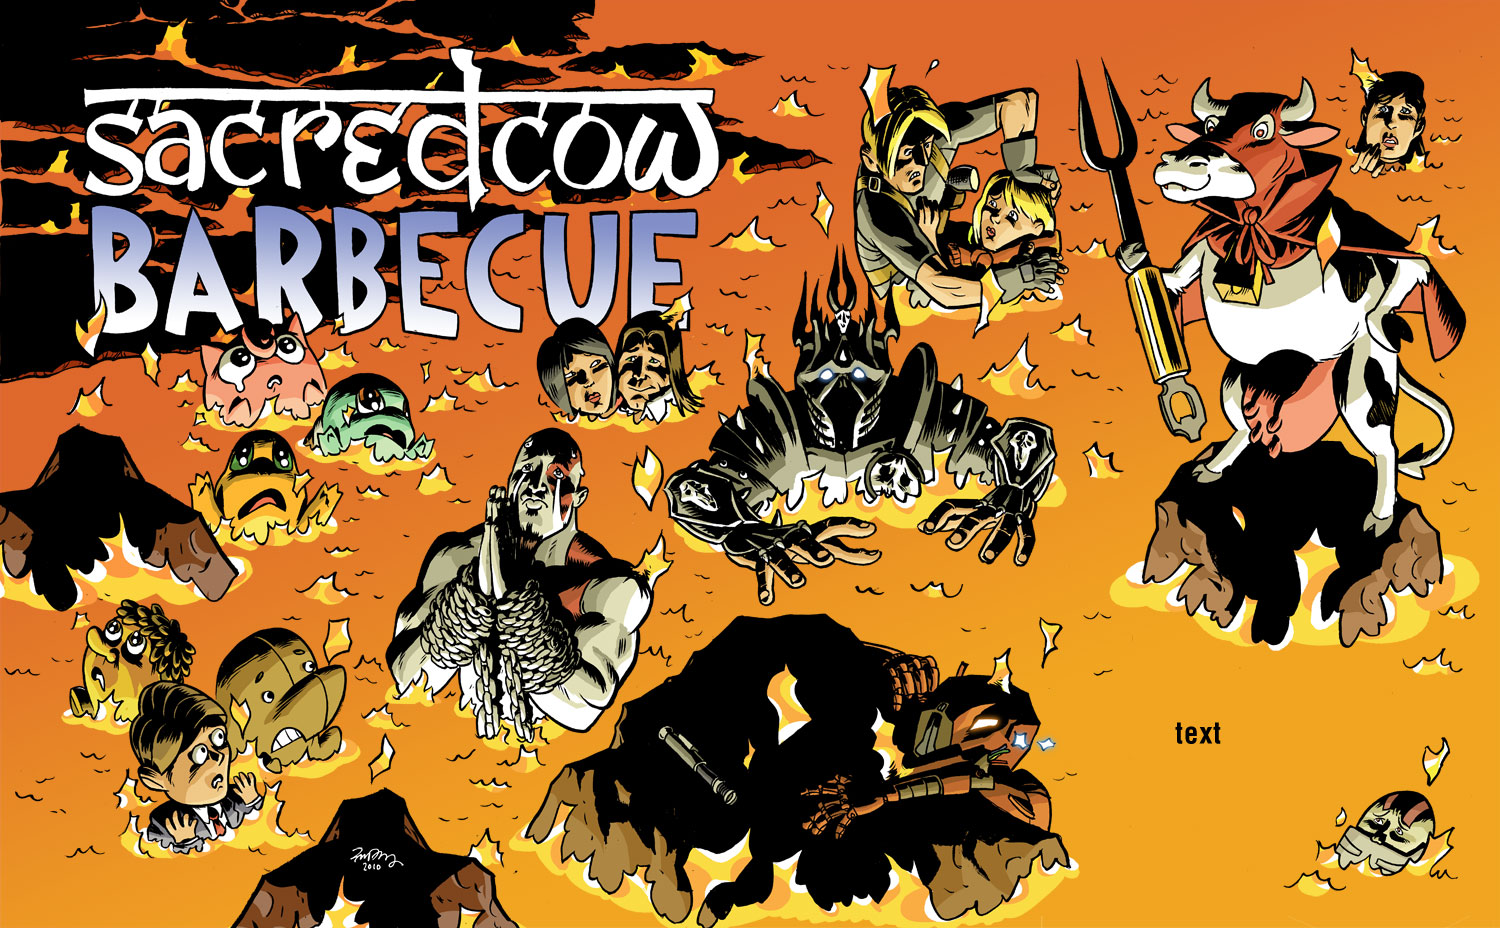
Then I went in and colored that sucker. I usually struggle with color for the first 75% of a job because you're basically putting in placeholder colors and everything looks terrible, so for this one, I scrapped that plan and basically just started coloring each character in their own layer. The only guide that I used was that each character was uplit by the lava pits, so I used the established colors of all the characters, cheating them slightly toward yellow, and put shadows on the top of shapes. I dropped in the orange of the lava pits, then put in pools of yellower lava (that's a thing, right?) to give it a texture. The drawing looks pretty solid now; if anything, it needs the people in the foreground to pop, so...


I created a layer above everything else where I then drew in some very harsh, hot rimlights on the top of all of the characters, popping them out of the background. I also made a white glow on the ground where they are standing to draw attention to the environment and not make it look like they're floating.


It's funny to look at the artwork after all that without the line art and realize how I've basically entirely recreated the drawing I already did. And I want to point out here that this is extremely sloppy. Any proper colorist would probably be horrified at the holes in the color and the lack of precision under the lines. I will say don't emulate this, but I will also say that it doesn't matter a great deal as long as 1) no one else has to deal with your sloppy work and fix it up, 2) you're not making any hard-to-fix mistakes like anti-aliasing your lasso tool, paint bucket, or magic wand, or using a pencil tool on less than 100% hardness, and 3) it looks good.

At this point, the drawing is essentially finished, but there were a few things I still wanted to do.

SPECIAL EFFECTS

I'm usually simple man with a simple plan when it comes to special effects in Photoshop, but I needed to give this drawing the sense of unreality that Mortal Kombat has, so I wanted to do two things: give the white highlights a glow, and screen down the background line art. In order to do this, I moved the final, flattened color art back to my line art file and then went in to adjust the colors of the lines.

ATMOSPHERIC DISTANCE


I wanted to give the heated air above the lava pit a sense of thickness, so I placed a low-opacity layer of yellow over the background areas of the color layer, and then went in with the pencil tool and colored the line art of those background a dark brown. It's hard to notice the difference except when it's next to a stark black line, but it really works to push those characters back to the background.


I also colored the line art of the flames and the lightning to add to their effect.

GLOW

What I did with the glow for this final step is:
1. Select the line art with the magic wand tool.
2. Go to the white highlight layer, and delete. This should delete all of the white that was under the lines.

If you look very closely, you can see that it trimmed away a tiny bit of the white. This is because the White layer is going to be above the line art layer, and we don't want it to block any of the line art.
3. Deselect, then copy the white layer. Name the two identical layers 'White' and 'Glow'. 'White' should be on top of 'Glow', and both layers should be above the Line Art layer.


4. On the Glow layer, make sure nothing is selected, and go to Filter>Blur>Gaussian Blur...

5. This makes the Glow layer blurry. In fact, if you're not looking very closely, it may seem to have disappeared altogether. But it's there. The White layer provides the harsh white light, and the Glow seeps the light out over the black and surrounding colors.
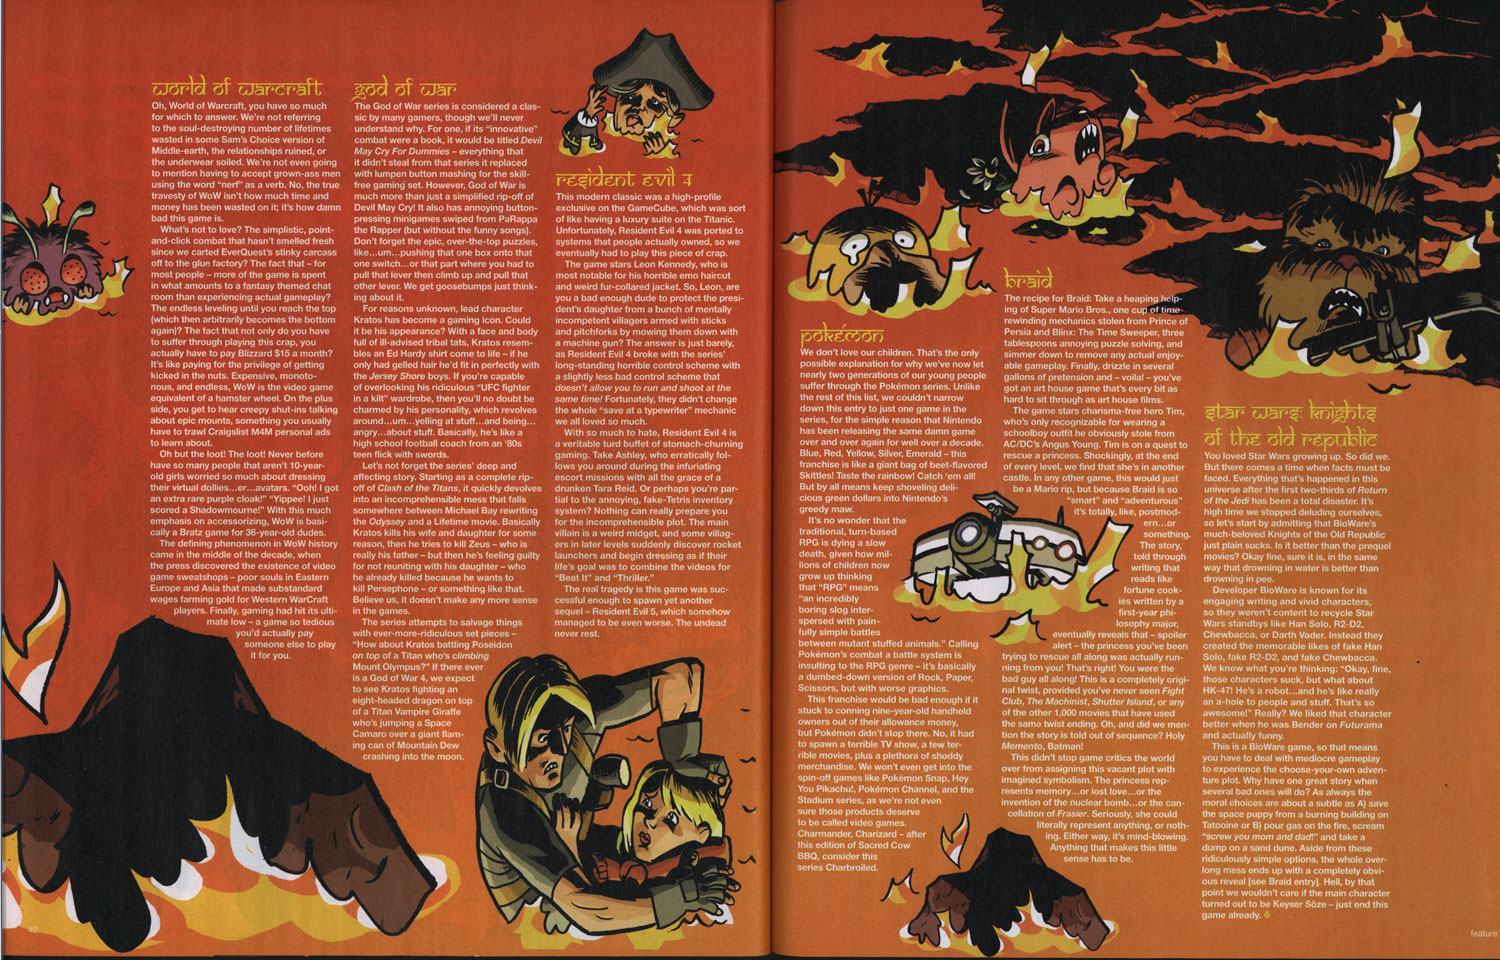
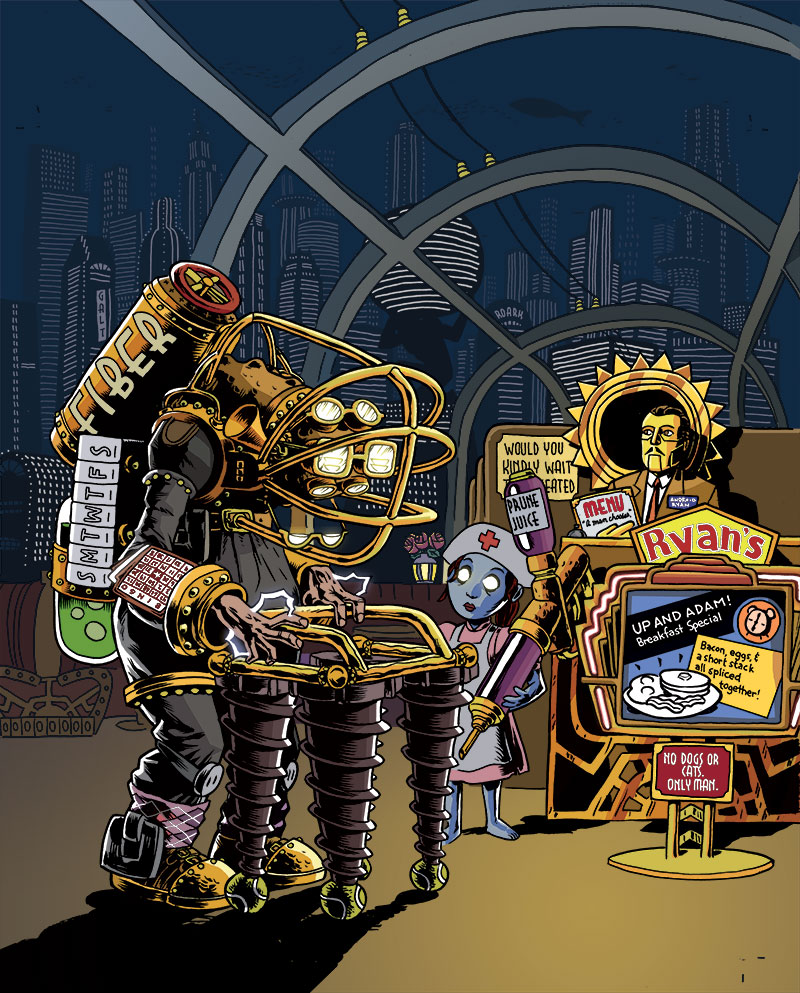
PRINTED IMAGE

And there we go! What do ya think?
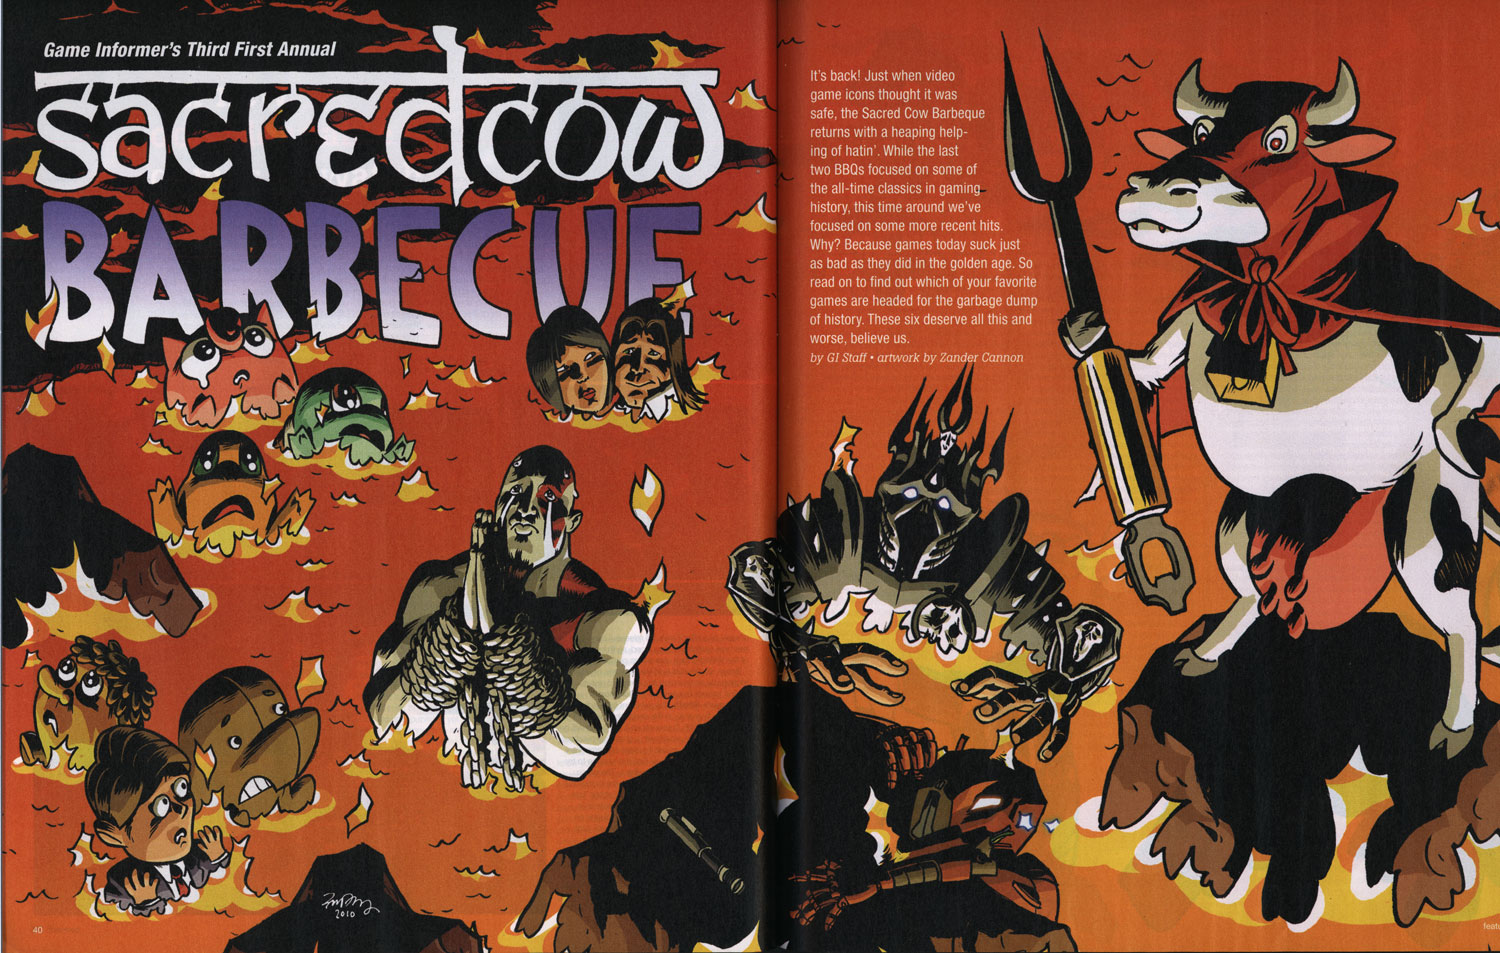


Thursday, November 04, 2010

Zander's Game Informer Sacred Cow Barbecue Illustration

Game Informer, the best video game magazine out there, has once again sent a gentle whisper out onto the wind saying they need an illustration that has lots of video game related gags in it. And I respond by kicking down their front door and saying I'm the man to do it!


The recurring feature Sacred Cow Barbecue, a no-doubt-very-satisfying opportunity for GI's editors to say bad things about all of the games that people love, is fun in a different way than Game Infarcer (the April Fool's drawing) for a couple reasons. One, it allows me to draw a bunch of characters from a bunch of different games rather than from just one. Two, it goes across two pages, plus little spot illustrations interspersed throughout the rest of the article, so it's more piecemeal, and individual figures or groups are more important than the overall composition. And three, from a technical standpoint, since the illustrations are likely to be in the hands of the production department who have to fit them around all the text, the image has to be delivered in many, many layers so that they don't have to chop it up more than necessary.

The first thing that happens is that I go down to GI and talk with some editors (who I won't name this time so that they don't get hate mail). They give me the list of the games that are going to get a kicking in the article, and I write them down. One thing that I did differently this year is that because the last two Sacred Cows were in picnic environments, with the characters being grilled, skewered, roasted, and otherwise mishandled, I wanted to change from that and show something different. One idea was that the figures would be cows in a field, dressed up as the game characters, but since the games chosen are not as iconic as things like Mario or Halo, we figured that it might not work well as a gag. My other idea, and one that fit in well with the idea of giving the production department the most leeway in their layouts, was all of the characters in a lake of fire. It doesn't have as many opportunities for good gags the way a picnic environment does, but it ends up being kind of fun from a cartooning point of view, focusing on characters' body language and expressions.

SKETCH

After going back to the studio, I worked up this sketch for GI, which basically laid out the characters, their expressions, their placement, and where I thought the text (introducing the article) could go. I also went ahead and did a title treatment because why not.

The idea here, in terms of delivering the image, was that the characters were all independent of each other and the perspective the illustration takes didn't limit where they could be placed (though you want characters to be facing inward for the most part, and asymmetrical characters like Kratos can't be flipped, so there are some parameters here). I was trying to make the drawing as flexible as possible for the layout people.

PENCILS


Once that was settled on (and I figured out which World of Warcraft character I'd put in there), I worked up the pencil stage. I was really trying to have variable sizes of all the characters, such as the rock with HK-47 on it and the devil cow, on down to the concerned-looking Bastila in the upper right corner and Darth Malak in the lower right. I tried to throw in some sight gags as well, such as Kratos praying for mercy (not a likely scenario in God of War), Leon Kennedy pushing Ashley into the lava (she's a real pain in the neck in Resident Evil 4), and Luis looking like he's getting awfully cozy with Ada Wong (no reason, just thought it was funny). Also, it's pretty satisfying to draw Pokemon with big teary eyes as they burn. Sorry, Pokemans.

INKS


Next come the inks, and while this is a single image, all of the characters were inked separately-- I blew up the pencils on the computer and printed out several sections in non-photo blue, then inked them all so none of them were touching each other. You can tell this by some of the flames intersecting each other here. If you look closely, you'll see that I did something pretty lazy, too: the rock on the very bottom of the image is the same as the one on the left, just flipped left-to-right. Man, I saved myself like 90 seconds there.

COLORS


The colors here were pretty straightforward from an aesthetic point of view. I made a color sketch at a low resolution just to get the feel of things.

From this, I knew the overall color was going to be a lava orange, and that that color was going to affect every other color on there. So then what I basically did was color every character their normal color, as if they were in neutral, full-spectrum light, but lit from below, then put a yellowish-orange low-opacity layer over them so that every color shifts toward that. Beyond how warm that makes the drawing look, it also unifies everything and makes it so you don't even really notice. Greens still look green, but if you saw that color by itself, with no orange-yellow around it, it might not look green at all.

I also quickly whipped up some cooled lava in the upper left corner to pop out the logo, which I inverted. If I had thought of it earlier, I might have put in more of that dark lava to give the drawing a darker, more ominous look, but I felt like it worked well, and I still wanted to keep the drawing adjustable.

GLOWY EYES


I also did something that I like to do every once in a great while. I usually like to keep the color mostly flat and cartoony (and simple to do), but sometimes there's someone that just needs to have glowing eyes. So without having to make it a big hairy deal, I have this quick, 4 step process:


1. Once everything's colored, go to the line art layer and select the inside of the area you want to glow. It shouldn't go under the black lines at all, just right up to them.

2. Make two new layers above the line art layer. They should be the top two layers. Call one "Blur" and one "Glow". With the area still selected, color it white on the "Glow" layer and orange or whatever color the glowing thing is on the "Blur" layer. Deselect.


3. On the Blur layer, do not select anything, but go to Filter>Blur>Gaussian Blur... you can move the slider to see how many pixels you want to blur it. It all depends on your resolution.
4. Voila! You have a glowing eye or thing. The white looks just like it's an ultra-bright orange when it has that orange glow around it.

ADDITIONAL SPOT ILLUSTRATIONS


Last time I did a drawing for Sacred Cow Barbecue, the layout guys reshuffled my layout quite a bit and sampled illustrations from the main spread to use throughout the article. I liked that idea, but I wanted to make sure there were enough original illustrations that we didn't end up using things twice. So I drew up a number of single spots that could work anywhere on a lava background and colored them, providing them as individual Photoshop files for the production department.

ALL THIS PLANNING...DID IT WORK?


Kind of. Here's how the two-page splash looked in the magazine. I was starting to worry as I got close to the deadline that my layout was not leaving a lot of room for text. I mean, it left some, but they were going to have to keep it pretty short if it was going to fit in there. I figured that something like that was going to happen.

Obviously I'm open to reshuffling the details in an illustration; I built the concept of this drawing around it. Unfortunately, two things which I didn't foresee happened. One is that they enlarged the devil cow by quite a bit. That sort of thing is fine when you're dealing with painted images or photographs, provided that they are high enough resolution. But the problem with cartoons drawn with pen or brush is that the line weight and quality is a dead giveaway for scale. So when you blow up a drawing, even if the lines are still crisp, you can tell that it was not originally that size because all of the lines are thicker than everything around it.

The second thing is that the Lich King (center) is rotated about 5 degrees. Eh. Weird.

What they did right was that this is an excellent layout. It's asymmetrical, it has a lot of weight opposite the logo, and it moves your eyes around, not to mention leaves room for text. If I had thought more about that, my version and theirs might not have been so different.


They ended up moving a lot of characters from the first spread to the second and creating shapes there to move the text around, which is a fine idea; perhaps cramming 16 characters on one page was a bit much.

And boy did they get their money's worth on that rock. It's there twice--that's four times in four pages!

WHAT DO YOU THINK ABOUT THE ARTICLE?

This was a funny article, though they've pretty well run through the classic games by now and are beating on games that are 3 years old. I actually loved 2/3 of these games: Resident Evil 4, God of War series, Knights of the Old Republic, and Braid are some of my favorite games ever. World of Warcraft and Pokemon could drop off the face of the Earth and I'd never notice.

Basically, I like drawing video game characters and if they're burning in a pit of fire, so much the better! Thanks again, GI!


Friday, March 12, 2010

Bioshock 3 Game Infarcer cover!

[click on images to see a larger size]
It's that hilarious time of year again, at least as far as magazines are concerned. The April issue of Game Informer magazine, out this week, has a small section inside called Game Infarcer, which mercilessly mocks all the games that they stare at all year. This year: Bioshock 3. HA! Take that, 2K games! We love your game enough to mock it!

This issue marks our fifth year drawing the cover to the section (Thanks, GI!), and to celebrate, we'd like to go through the process of creating the cover, from concept to delivery.

CONCEPT

At the beginning of every February, I start wondering when someone from Game Informer is going to call for the Game Infarcer cover, and sure enough, Bryan Vore calls up and sets up a meeting, and asks if this cover can be "in a more realistic style". Naturally, I say sure thing, then end up drawing it the way I draw everything. Professional secrets revealed!

When I get to Game Informer World Headquarters (about 3 miles from here), the guys all sit down with me and give me the pitch: Bioshock 3, with Big Grandpas. But the best part is: they give me a sketch.


[notation added by me]
I love it when people do sketches. Sometimes people think I'm going to laugh at them or are embarrassed to show what they've done, but I love seeing what people have in mind visually even if they "can't draw a straight line", because it saves me from trying out all the composition pyrotechnics at my disposal. Any artist knows there are millions of ways to lay out the same picture, but the simplest ones are frequently the best, and if that's what the client has firmly in mind, it's usually a good idea to go for it. In the process of making the sketch, the client can also see some potential for ideas and put them down, instead of just making a list or having to remember them. It also lets them see if they can even envision a visual way to communicate the joke, which is a good indicator as to whether I can, as well.

During the meeting, since everyone could see the sketch, we could jump off into ideas a lot faster, and we quickly came up with things like the daily pill container, the Fiber valve (that was Joe Juba), Android Ryan (also Joe), the idea of being at a Denny's-like breakfast place, the Rapture background, and the Prune Juice syringe. These sorts of "list" drawings--ones that contain subtle in-jokes around a given topic--are always my favorite because they're very information-heavy, and are less concerned with rendering, which I enjoy, but is not my particular forte.

Also, Joe lent me a Big Daddy doll--er, action figure at the meeting, which was very helpful in drawing details.

INITIAL PASS

What I like to do when I start a job is to try to ride the wave of enthusiasm as much as I can, and frequently this means I can really make some headway. When I come back from a meeting with the guys at Game Informer, we've been brainstorming and joking about the image, and the game, and other funny obscurities that could make it in there, and so I'm bursting at the seams with ideas. So even though it was late in the day and I needed to get home, I quickly sat down and sketched out what was in my head for the Big Grandpa and the Little Sister Nurse.


This gave me the chance to distill down some ideas, cement some gags in there, and think of some new ones when a corner of the drawing is looking kind of lonely. As you can tell, it also allowed me to basically lock in the general "camera angle" of the drawing. This was a pretty lucky break--it doesn't always happen that way--but just dashing stuff down without overthinking it often gets the simplest (and best) results.

The next day, I took another sheet of paper and drew around all the other elements of the drawing: the environment, the signs, the greeter, etc. I married these two images in Photoshop and dropped in a Game Informer logo and Bioshock 3 graphic for placement so that I could send it off to the guys for feedback.


This part also allowed me to add more jokes--the Denny's-like Ryan logo, the sign advertising the specials that looks like the Plasmid upgrade graphic, the Little Sister ornate escape hatch, the detailing on the seats and host stand that are similar to the doors in the game, and the gold-glowing rose in the tonic container way in the background. If you look closely, there's even a cash register on the far right, just like in the game. But then I realized host stands don't have cash registers. This drawing will be nothing if not accurate!

PENCILS AND INKS

The sketch is relatively tight, as you can see from how similar it is to the final drawing, so the next step is to blow it up in Photoshop and print it out in 10% cyan on a big sheet of paper. From there I can go in with pencil and brush and create the final linework.


Now, normally, people pencil the whole image before inking, but I'm kind of impatient, and sometimes if you're sure about a section of the drawing (that is, you're sure it's going to be in shadow or something), it can be useful to go ahead and ink it. It can frequently give you better ideas on how to pencil the rest of the page, and it sets a certain style.


When I was finished with the foreground inks, I sent the image to Game Informer again, just to show them some progress, and it yielded a valuable addition. While I had added jokes to the sign and the menu, I had entirely neglected the "Please wait to be seated" placard. If you've played Bioshock, you know that there is a perfect addition to make to this sign, and Jeff Cork pointed it out. "Please..." was changed to "Would you kindly..." and our drawing was now officially stuffed as full of jokes as we could make it.

COLORING


Coloring is difficult for me, particularly things that have to be relatively atmospheric. I tend to like to color with flat colors rather than with a layered, textured look, but I tried to blend the two for this illustration.

For the background, I drew outlines of the buildings with dots for windows, then made several layers, each with a layer of blue to indicate distance. Here was the final opportunity to make jokes, so I threw in a few Ayn Rand references (the signs saying "Roark" and "Galt", two Randian heroes, and the Atlas-shaped building (pre-shrug). In case you don't know, Ayn Rand's works, particularly Atlas Shrugged, were a major influence on the philosophy of Bioshock and Rapture, its underground city.

Gloomy blue and glowing gold were the basic colors for the game of Bioshock, so I created a warm gold light spot in the lower right to focus attention, then colored all of the figures with gold highlights coming from that direction to unify the scene. The background could stay a largely uniform neutral blue that would pop out the figures. As a final consideration, I did something I rarely do--I added a glow to certain things: the Big Grandpa's eyes, his lightning bolts on his hands, and the Little Sister's eyes. When put into an image that is mostly flat colors, effects like that can be quite striking.

PRINTED IMAGE


When the image makes it into the magazine, I always hold my breath a little, hoping that it will look okay. These days you can be pretty sure that what's on your screen will print out okay, but you never REALLY know. I was thrilled when I got this one in the mail. As you can see, they moved the image up and zoomed in a tiny bit, overlapping the top of Big Grandpa's fiber tank with the logo (I provided another layer of just the top half of that figure in case they wanted to do that), and they extended the shadow in the lower left to get in the copy for the joke, which I'm glad they did. I feel like the image is solid, and a good joke, but it does need a little explaining.

So go out and find the April issue of Game Informer! It's the one with the Portal 2 cover. Ah, not only a drawing in an issue of Game Informer, but one about the sequel to my favorite game. It's the icing on the cake.